A while back we shared some tips on how to make Windows Vista perform at a faster and more efficient manner. Now we want to do that for Windows 7 but not to only say the same things but to build on it and add some other tips Vista users may use as well.
Disabling Search Index
Since Vista, Microsoft has incorporated a neat feature in Windows 7 that’s very accessible, the search function. Pressing “Start” or the WINDOWS button there is a small search field on the bottom that functions very similarly with Mac’s Quicksilver. The difference is that one of them works a lot faster and better.
For Windows it used to almost function as a virus scanner in its speed and interface. This weakness was very apparent that Microsoft intervened and created something called the Search Indexing Feature. It pretty much indexes all your files in case if you ever search for them, they can be found fast.
Now the problem lies in the answer to the question, do you use that feature? If not, it’s advantageous for you to turn it off. I have read testimonies from other users that tried this tweak and claim 10-20% less RAM usage.
1. To get started open up explorer, (WINDOWS + E).
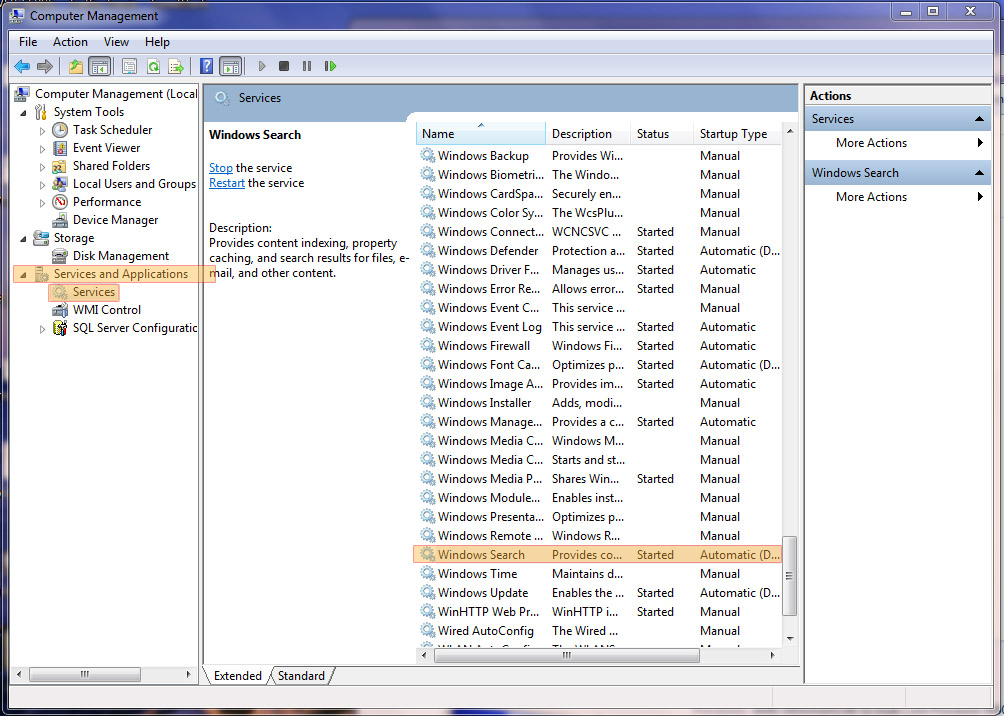
2. Right click on the name of the computer-> Manage. It’ll open this nifty window.
3. Go to: “Services and Applications”-> “Services” -> “Windows Search”.
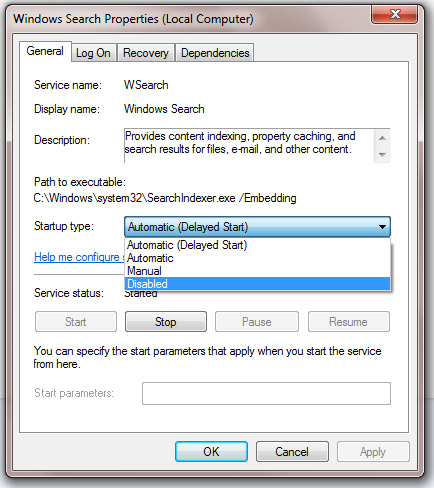
4. Then it’ll open up another window.
5. Under the “General” tab, click on the drop-down menu of “Startup type” -> Disabled
Turn off the Gadgets
All those nifty things usually on the side that you may not need may eat up some of your start up time. Some of them are pretty neat and helpful, but may not necessary to be there on your display all day long.
Take the weather gadget for example. Knowing the general weather conditions for the day is important, but you probably don’t need contstant updates all day. A simple visit to a weather website would suffice.
Right-click on it and and un-check the check box that says “Start sidebar when Windows starts”
Change the Power Plan, to Maximum Performance
By default, Windows 7 has the power setting of the computer on a “Balance (Recommended)” plan.
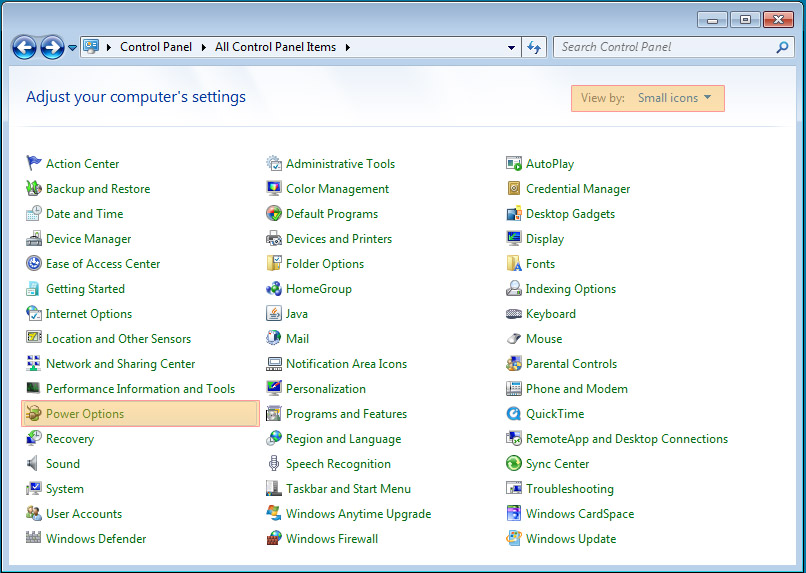
1. To change this, get to your control panel(On the side of the Start menu).
2. Make sure you’re on small icons, and not category, then go to Power Options.
3. After that there’ll be a menu that’s very intuitive; just switch the option to “High Performance”.
These tips should help you better ensure that your Windows 7 PC is operating at maximum performance. If you have any other tips on how to improve Windows 7 performance, please share in the comments below!


